skip to main |
skip to sidebar
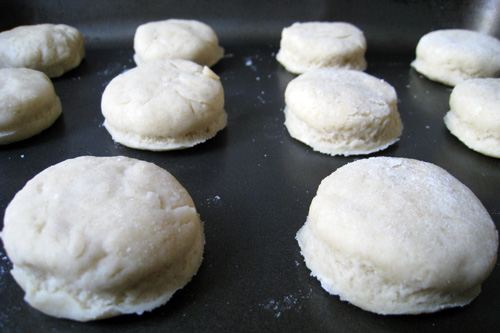
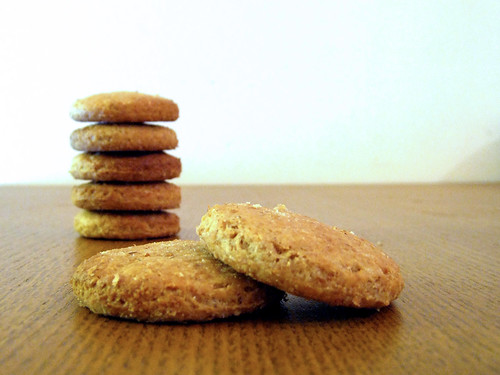
You know, I'd forgotten just how quick and simple scones are to make! I remember making them at school, and several times at home but as my baking skills matured the modest and pretty scone got left by the wayside. With a move to London approaching, I was looking at my cupboard ingredients the other day and wondering what I could make to use up as much flour as I could without the need to buy new ingredients. Scones were the perfect solution and mini ones to me are rather cute. Served (and eaten the Cornish way!) with sweet strawberry jam, cool and silky clotted cream and a pot of hot tea, I couldn't think of a lovelier home-made English summer afternoon treat.
Easy-Peasy Mini Scones
Makes 12 - 225g plain flour
- 1.5 tsp baking powder
- Pinch of salt
- 50g unsalted butter, left at room temperature and cut into small pieces
- 2 tbsp caster sugar
- 80ml milk, plus a little extra
Preheat oven to 220C. Sift the flour, baking powder and salt into a roomy mixing bowl. Add the butter and rub together with fingertips until mixture resembles breadcrumbs. Stir in the sugar. Add the milk and bring mixture together with a knife, then use your hands, adding a spot more milk if necessary to form a dough. On a lightly floured surface, roll the dough to 2cm thick. Stamp out rounds with a 5cm round cutter and place onto baking tray. Re-roll dough and stamp out the rest. Brush tops with a little milk. Bake in oven for 12-15 minutes until golden.
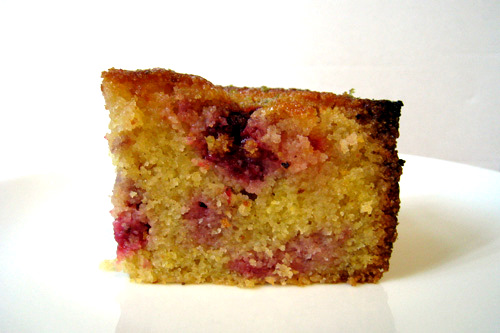
I made this cake for a picnic at the beautiful Dyrham Park last week and it went down a real treat. I think it embodies the glorious, heavenly summer we are (were!) having at the moment in the UK, as much as I feel orange and cranberry muffins embody winter. Actually the two are really quite similar in theme and flavour yet are seasons apart.The first time I tried polenta cake was when an Italian friend introduced me to a lemon one and since then I've been hooked. Given a choice of a rich, moist chocolate cake or a citrus polenta cake to go with a cuppa, even an indecisive cake-lover like me will not hesitate to opt for the polenta. There's something exquisite and refined, and almost healthy, about polenta cake. I can't help but feel quite lady-like whilst eating it!My recipe is adapted from this one and I am chuffed to bits with how it turned out. The polenta gives the edges a bit of a crunch and the inside is lovely and moist. I was worried the cake would be either too sweet or too sour but neither were the case at all. It was such a success I've already made it again since!Dyrham Park
Raspberry Lime Drizzle Polenta CakeMakes one 8 inch square cakeFor the cake:- 200g softened butter
- 200g golden caster sugar
- 3 medium eggs
- zest of 2 limes
- juice of 1 and a half limes
- 150g polenta
- 120g plain flour
- 1 and a half teaspoon baking powder
- 225g raspberries
For the syrup:- juice of 3 and a half limes
- zest of 1 lime
- 120g golden caster sugar
Line 8 inch square tin (not loose-based) with buttered greaseproof paper and preheat oven to 160C. Cream butter and sugar together until light. Gradually beat in eggs then the lime zest. Fold in polenta, plain flour and baking powder followed by the lime juice. Fold in half of the raspberries and turn the mixture into baking tin. Scatter the remaining raspberries on top which will sink as the cake rises. Bake for 1 hour (cover cake with foil if it starts to brown too much) or until a skewer pushed into centre is clean when removed. Meanwhile make the syrup: put the lime juice, zest and sugar into a saucepan. Put over a low heat and stir, allowing sugar to dissolve. Do not allow to bubble. As soon as cake comes out of oven, prick all over with skewer and spoon syrup over it. Allow to cool and cut into 12 pieces to serve. To store, wrap in paper and/or foil.
Unfortunately my scales weighed their last bit of flour a few weeks ago before packing it in meaning I have not been able to bake for a while. However there is one substitute that doesn't always require the use of scales and is staving off the baking withdrawal symptoms: traybaking.
I think rocky road has to be one of my favourite traybakes. You only have to look at the ingredients in front of you to know that in just over two hours you will have an irresistable chunk of chocolate satisfaction waiting for you to sink your teeth into.
I like mine made with a mixture of milk and dark chocolate which does not have to be the expensive stuff. This isn't about sophistication or the best ingredients you can find, I hate to say it but it's about pure junk food. To ensure it didn't turn out impossible to slice I added olive oil spread, honey and maple syrup to the melted chocolate because that's what I happened to have in the fridge although just the spread or some butter would suffice. I also topped mine with dessicated coconut, again because I happened to have some.
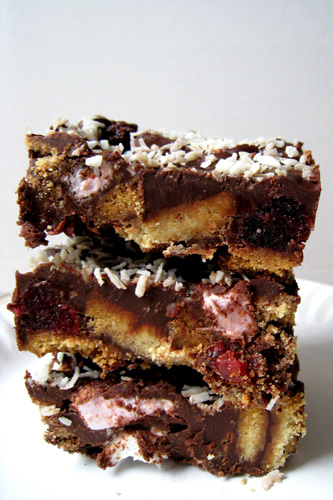
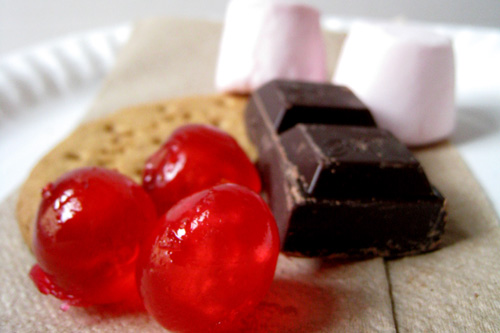
These came out really well which isn't hard to achieve really because nomatter how wrong the proportions might be, tastewise it's still bound to hit the spot. Chocolate, marshmallows, cherries and digestives - you can't fault the combination!
Rocky road
Makes one 8x8 inch tray
- 300g chocolate (mixture of milk and dark)
- 2-3 tbsp olive oil spread (reserve the third and add if the melted chocolate is still too thick, I find this differs between chocolate brands)
- 1 tbsp maple syrup
- 1 tbsp runny honey
- 7 digestive biscuits, crushed into random sized pieces
- 10 marshmallows, quartered
- 20 glace cherries, halved
- 2-3 tbsp dessicated coconut (optional)
Line baking tray. Melt chocolate, olive oil spread, maple syrup and honey together in a bowl. Once melted and combined reserve 75ml of mixture and set aside. Add digestive biscuits, marshmallows and glace cherries to chocolate mixture and mix. Press mixture into baking tray. Spoon and spread the remaining 75ml chocolate mixture on top, and sprinkle with dessicated coconut. Cover and chill in fridge for 2 hours or overnight. Can be kept in fridge for a fortnight but it's so yum that it's unlikely to last that long!
What I love about Shrove Tuesday is that you can eat as many crepes or pancakes as you like without feeling like a freak. Crepes for breakfast, lunch and dinner? Go ahead it's Shrove Tuesday! Three course meal of blinis, galettes and crepes? Why not? It's Shrove Tuesday! I relished a two course meal of an egg, ham and cheese galette and chocolate crepe in the wonderful Creperie de Josselin in Paris a couple of years ago. Portions were huge and while my boyfriend sat struggling with his, I sat as if I was in pancake heaven. Only in a creperie in France or on Shrove Tuesday would I be able get away with it. I have received astonished looks from those who have witnessed me munch through pancake after pancake in one breakfast sitting. In nursery school when I tried my first pancake ever on Shrove Tuesday, I remember my teacher laughing "Another one?" as I went back for a third. I still remember clearly how they tasted. Soft, squidgy, warm and buttery.
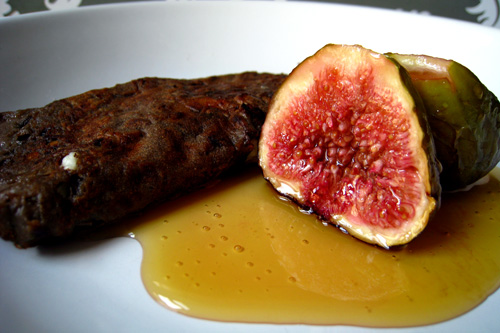
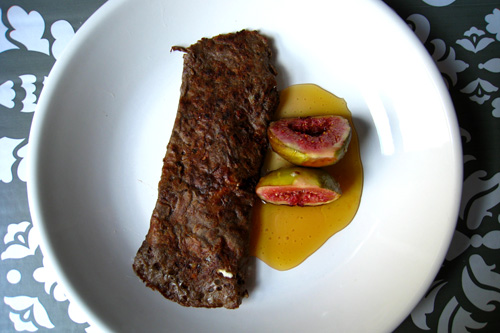
As I have a busy week ahead and it's been since Paris that I had my last galette, this year Shrove Tuesday is Galette Sunday. Made with buckwheat flour rather than white or wholemeal, galettes are darker and crispy and make for nicer savoury dishes than its softer, paler cousin the crepe. Buckwheat is also gluten-free so these are a great alternative for coeliacs, plus vegans get a look in too because the recipe I've used is free of eggs and milk. Fillings obviously would need to be adjusted to suit. Be sure to make the batter ahead of time to let it rest, preferably the night before, otherwise the galettes will be too brittle to fold.It may have been the recipe I chose, but my experience today taught me the perfect galette takes a lot of practise. They say the first crepe in the pan is always the worst, but in the case of galettes, or maybe more specifically my galettes, it is the first three or four. The trick is to have the batter at the right consistency and not to pour too much into the pan. The thicker it is the longer it takes to cook and nomatter how long I left it, it remained very wet. When I did manage to make a lovely crisp galette, it was when just enough batter was poured to thinly cover the base of the pan, so thin that several little holes appeared as it cooked but don't worry about these. Better to have a crispy galette with a few holes than a big brown mushy mess in your pan. I should have taken a picture of my pile of failed attempts which just seemed to get bigger and bigger.Opting for the sweet-savoury sensation I filled them with goats cheese seasoned with black pepper and thyme, and served them with warm baked figs and honey. Delicious.Goat cheese galettes with baked figs & honeyMakes 8 servings
For the batter:- 250g buckwheat flour
- 125ml water
- 125ml sparkling cider (or water which would do just as fine)
- 5g salt
- 300ml water for after batter is allowed to rest
For the filling:- 500g soft goats cheese, crumbled
- thyme
- black pepper
For the baked figs:- 8 figs
- 5g butter
- 5 tsp sugar
- lemon juice
Add salt to the flour in a bowl and mix in the water and cider in two parts. Once combined mix on lowest setting if using a mixer or by hand for 10 minutes. Allow batter to rest in fridge for at least 4 hours, or preferably overnight. Add 300ml water, going slow with the last 100ml which should be added gradually to achieve the required consistency of somewhere between that of single and double cream. Mix on slowest setting or by hand for 5 minutes. Figs can go in the oven before the second mixing of the batter. Preheat oven to 200 degree C and smear butter on base of baking dish. Trim stems from the figs and cut figs in half. Place figs cut side up on baking dish and sprinkle with half the sugar and a little lemon juice. Place in oven for 15 minutes. Baste with juices before sprinkling over the remaining sugar and baking for a further 5 minutes.To make the galettes, heat a frying pan or round flat griddle until hot. Smear with a little butter. Pour just enough batter to cover base of pan thinly. Allow to cook then top with goats cheese according to how the galette will be folded. You are not meant to flip galettes but I cheated and flipped mine (which was a feat in itself) to get them to cook. Sprinkle cheese with some fresh thyme and ground black pepper. Allow cheese to melt before folding galette and serving with baked figs and honey.
 As I was in London for the weekend, we had planned to have sunday lunch at Little Bay in Farringdon to take advantage of their current 'pay what you think it's worth' February promotion (get there while you can!). This was until we realised that in typical London fashion all underground lines to Farringdon were closed for engineering works. To save from further disappointment we decided to head towards Chinatown where we were bound to find a place for some tasty eats before I boarded the train back home.
Leong's Legends was first in our list of preferences. I have wanted to try this well-reviewed Taiwanese restaurant for quite some time, especially having experienced the real deal in Taiwan and missing the food there desperately. Looking at the menu in the window not many dishes struck me as Taiwanese but we wanted to give it a go anyway as it was also recommended by a Taiwanese friend. So in we went. The place was packed and the staff were busy. So busy that we were completely ignored for the whole time we stood there feeling like right plums. Pushing past us several times to grab whatever they were grabbing not a single member of staff made eye contact or offered "We're full right now, you will have to wait a while" including someone who appeared to be the manager. Having eaten in all sorts of Chinese places I'm quite used to abrupt or unfriendly service but I've never been blanked so rudely before. It was particularly poor and surprising especially for quite a nice looking restaurant so I'm torn between trying again in the future or not. Feeling slightly, though mainly wrongly, embarrassed off we went in search of somewhere else.
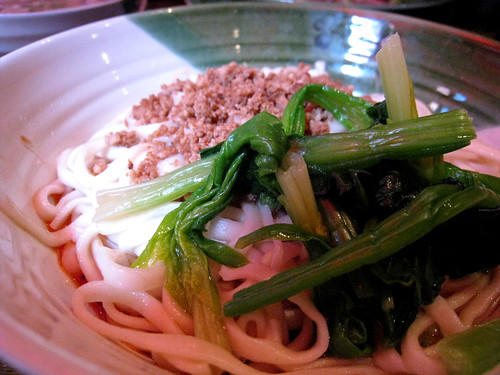 Dan dan mian
Baozi Inn was next on the 'to try' list. Specialising in Bei Jing and Sichuan dishes, was Baozi Inn to be our third time lucky? Well we managed to get fed so I guess so! We walked in to be immediately greeted and seated by the window in a 1950's China kitsch setting. Low wooden stools, exposed brick, red lanterns... it all looked quite charming but possibly a little polished for what it was trying to convey. And the plastic vegetables looked a little out of place to me and more suited to a French or Italian.
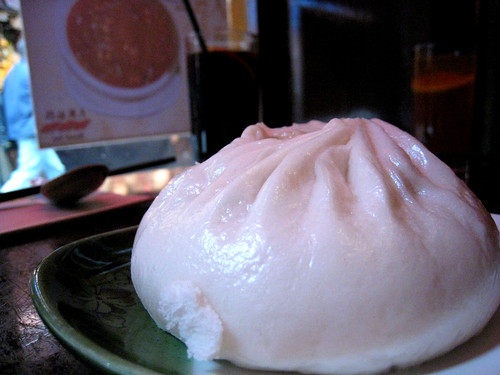
My boyfriend ordered a set meal which consisted of pork rib noodles in broth, dragon dumplings in broth and pickled cucumber salad. I went for the Northern China pork baozi and the dan dan mian which is a very traditional Sichuan noodle dish. I also ordered a glass of coke which I oddly crave with spicy foods in anticipation of the mouth-numbing noodles. While the food was generally tasty and definitely filling, as I left I couldn't help feeling that it was ultimately disappointing, too salty and over-priced. My dan dan mian was very oily and barely hot and spicy enough to warrant the breaking of my usual avoidance of fizzy drinks. Instead of the heat I was after, I was left with an uncomfortable parched feeling in my mouth which I could only put down to copious amounts of salt and MSG. They were also very sparing with the topping of pork. And while the baozi was good, it was not good enough for a return visit, or maybe I'm just too attached to their Cantonese counterparts. The cucumber was tasty with a nice refreshing crunch but I think I appreciated these more for cleansing the palate which was much needed with my dishes but not in a favourable way. Positive notes were that the ribs and broth of my boyfriend's noodles were very flavoursome and the one dish I really couldn't fault were the dragon dumplings. The broth was light and just right, and the dumpling casings were lovely and silky. I could have had more of these very easily. Clockwise from top left: cucumber salad, dragon dumplings, pork rib noodles, dan dan mian, and my half-eaten pork baozi!Service was quick but there was some hovering which was quite distracting at times. When we arrived, there were two other sets of diners but by the time we left, the restaurant was steadily beginning to fill up. So while I was not impressed, I may be in a minority. All in all Baozi Inn was ok but didn't live up to the hype or to the prices. I've eaten better Northern Chinese and Sichuan cuisine cooked by friends from the regions. We paid £18 for our meal including drinks.Baozi Inn
25 Newport Court
LondonWC2H 7JS
Phone: 0207 2876877

What do you do when when lectures are officially cancelled because of snow? Jump for joy and bake brownies of course! I've made brownies twice before and both times they didn't turn out how I wanted. Texture-wise, taste-wise, everything. The perfect brownie recipe I think is one of the most elusive and this along with previous failures certainly made me wonder whether I should try again. However when the idea of that yummy chocolately dense fudgy gooeyness enters my mind I always want to be able to make it into something tangible, through my own efforts.
So here is my latest attempt which I made today and they're actually really good, my best attempt yet. Prevous mistakes have taught me well. I've learned that recipes with too much 70% chocolate and cocoa powder make brownies that are far too bitter. I've learned that I should not leave it baking for just a little longer. I've learned that plain brownies are better than those loaded with chocolate chunks or nuts. And from bakery or coffee-shop bought brownies, I've learned that I have a preference for brownies which have gound almonds in them.
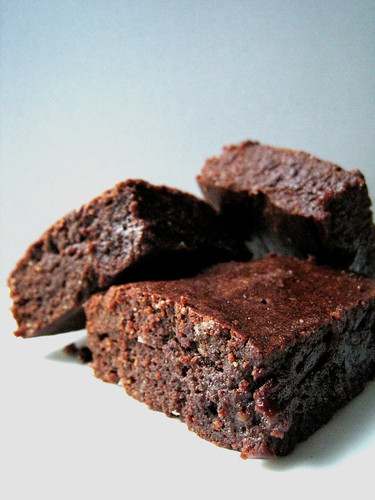
So a bit of a google search brought up Reine de Saba (Queen of Sheba) brownies which are a French brownie. These are based on the Reine de Saba chocolate and almond cake which requires the separating of eggs and the whisking of egg whites, and the addition of rum amongst some other ingredients. However the Reine de Saba brownie recipe which seems to be quoted all over the internet omits these.
The recipe makes soft, dense brownies and although they lack the flaky top layer, the top still has a slight bite and crack to it. I personally would prefer them slightly richer because I do like my brownies quite intense, then they would be perfect!
Reine de Saba brownies
Makes 9 squares
125g dark chocolate (I used 70%)
125g butter
125g sugar
3 eggs
60g ground almonds
50g plain flour
Preheat oven to 180˚C and line an 8x8 inch square cake pan. Melt the chocolate in a large bowl over simmering water. Mix in the butter until melted. Remove bowl from heat and mix in the sugar, then whisk in the eggs, and finally incorporate the ground almonds and flour. Pour mixture into the cake pan and bake for 15-20 minutes.
I baked mine for 20 minutes however I think less would have been better, or 20 minutes at a lower temperature, as the edges were a wee bit overdone. The middle was however lovely and dense and gooey.


