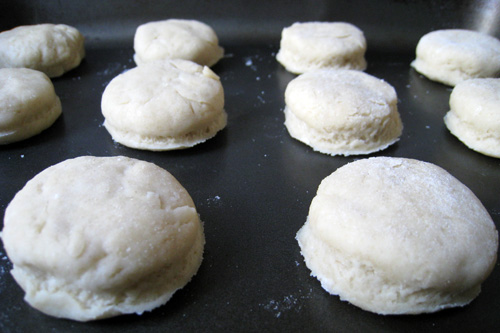
You know, I'd forgotten just how quick and simple scones are to make! I remember making them at school, and several times at home but as my baking skills matured the modest and pretty scone got left by the wayside. With a move to London approaching, I was looking at my cupboard ingredients the other day and wondering what I could make to use up as much flour as I could without the need to buy new ingredients. Scones were the perfect solution and mini ones to me are rather cute. Served (and eaten the Cornish way!) with sweet strawberry jam, cool and silky clotted cream and a pot of hot tea, I couldn't think of a lovelier home-made English summer afternoon treat.
Easy-Peasy Mini Scones Makes 12
225g plain flour
1.5 tsp baking powder
Pinch of salt
50g unsalted butter, left at room temperature and cut into small pieces
2 tbsp caster sugar
80ml milk, plus a little extra
Preheat oven to 220C. Sift the flour, baking powder and salt into a roomy mixing bowl. Add the butter and rub together with fingertips until mixture resembles breadcrumbs. Stir in the sugar. Add the milk and bring mixture together with a knife, then use your hands, adding a spot more milk if necessary to form a dough. On a lightly floured surface, roll the dough to 2cm thick. Stamp out rounds with a 5cm round cutter and place onto baking tray. Re-roll dough and stamp out the rest. Brush tops with a little milk. Bake in oven for 12-15 minutes until golden.
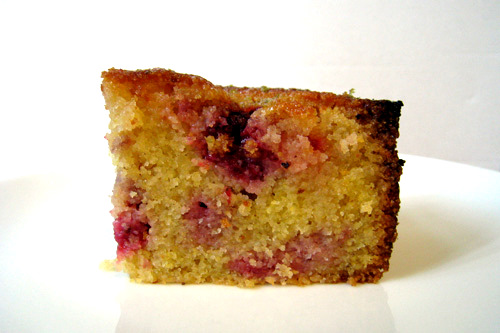
I made this cake for a picnic at the beautiful Dyrham Park last week and it went down a real treat. I think it embodies the glorious, heavenly summer we are (were!) having at the moment in the UK, as much as I feel orange and cranberry muffins embody winter. Actually the two are really quite similar in theme and flavour yet are seasons apart.
The first time I tried polenta cake was when an Italian friend introduced me to a lemon one and since then I've been hooked. Given a choice of a rich, moist chocolate cake or a citrus polenta cake to go with a cuppa, even an indecisive cake-lover like me will not hesitate to opt for the polenta. There's something exquisite and refined, and almost healthy, about polenta cake. I can't help but feel quite lady-like whilst eating it!
My recipe is adapted from this one and I am chuffed to bits with how it turned out. The polenta gives the edges a bit of a crunch and the inside is lovely and moist. I was worried the cake would be either too sweet or too sour but neither were the case at all. It was such a success I've already made it again since!
Dyrham Park
Raspberry Lime Drizzle Polenta Cake Makes one 8 inch square cake For the cake:
200g softened butter
200g golden caster sugar
3 medium eggs
zest of 2 limes
juice of 1 and a half limes
150g polenta
120g plain flour
1 and a half teaspoon baking powder
225g raspberries
For the syrup:
juice of 3 and a half limes
zest of 1 lime
120g golden caster sugar
Line 8 inch square tin (not loose-based) with buttered greaseproof paper and preheat oven to 160C. Cream butter and sugar together until light. Gradually beat in eggs then the lime zest. Fold in polenta, plain flour and baking powder followed by the lime juice. Fold in half of the raspberries and turn the mixture into baking tin. Scatter the remaining raspberries on top which will sink as the cake rises. Bake for 1 hour (cover cake with foil if it starts to brown too much) or until a skewer pushed into centre is clean when removed.
Meanwhile make the syrup: put the lime juice, zest and sugar into a saucepan. Put over a low heat and stir, allowing sugar to dissolve. Do not allow to bubble. As soon as cake comes out of oven, prick all over with skewer and spoon syrup over it. Allow to cool and cut into 12 pieces to serve. To store, wrap in paper and/or foil.
What do you do when when lectures are officially cancelled because of snow? Jump for joy and bake brownies of course! I've made brownies twice before and both times they didn't turn out how I wanted. Texture-wise, taste-wise, everything. The perfect brownie recipe I think is one of the most elusive and this along with previous failures certainly made me wonder whether I should try again. However when the idea of that yummy chocolately dense fudgy gooeyness enters my mind I always want to be able to make it into something tangible, through my own efforts.
So here is my latest attempt which I made today and they're actually really good, my best attempt yet. Prevous mistakes have taught me well. I've learned that recipes with too much 70% chocolate and cocoa powder make brownies that are far too bitter. I've learned that I should not leave it baking for just a little longer. I've learned that plain brownies are better than those loaded with chocolate chunks or nuts. And from bakery or coffee-shop bought brownies, I've learned that I have a preference for brownies which have gound almonds in them.
So a bit of a google search brought up Reine de Saba (Queen of Sheba) brownies which are a French brownie. These are based on the Reine de Saba chocolate and almond cake which requires the separating of eggs and the whisking of egg whites, and the addition of rum amongst some other ingredients. However the Reine de Saba brownie recipe which seems to be quoted all over the internet omits these.
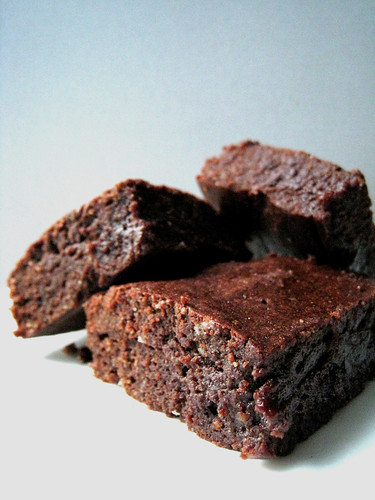
The recipe makes soft, dense brownies and although they lack the flaky top layer, the top still has a slight bite and crack to it. I personally would prefer them slightly richer because I do like my brownies quite intense, then they would be perfect! Reine de Saba brownies Makes 9 squares
125g dark chocolate (I used 70%) 125g butter 125g sugar 3 eggs 60g ground almonds 50g plain flour
Preheat oven to 180˚C and line an 8x8 inch square cake pan. Melt the chocolate in a large bowl over simmering water. Mix in the butter until melted. Remove bowl from heat and mix in the sugar, then whisk in the eggs, and finally incorporate the ground almonds and flour. Pour mixture into the cake pan and bake for 15-20 minutes.
I baked mine for 20 minutes however I think less would have been better, or 20 minutes at a lower temperature, as the edges were a wee bit overdone. The middle was however lovely and dense and gooey.
Finally! The deadline I had been waiting so long for has passed. Finally! I can catch up on all the foodie blogs I love. Finally! I can catch up on The Great British Food Fight!! Finally! I can take the time to cook again!
When I'm studying hard or know I should be, even just ten minutes to make a simple pasta dish feels like an eternity. If I'm not sitting infront of my laptop, I start stressing that I should be, despite the fact that a lot of the time even infront of my laptop I'm procrastinating as opposed to actually working.
I had wanted to write about a Chinese dish I made recently as Chinese New Year has just come and gone. It turned out really well, really delicious. However I kept it on the hob a little too long and certain components ended up looking a bit too worse for wear for photographing. Once I've perfected the dish though you will surely see it here.
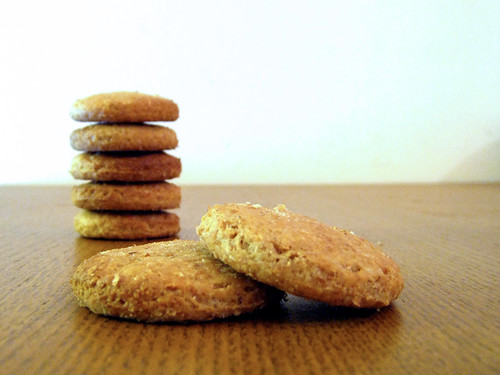
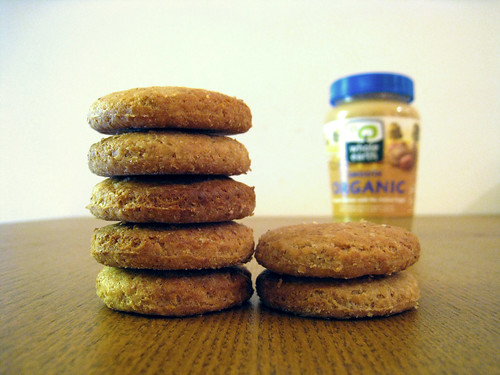
Or maybe I should simply stick to the baking! Baked things are without a doubt easier to pretty up and photograph. I baked these dog biscuits after the new year for when I went to visit a friend who only just got a miniature schnauzer puppy last autumn. Incredibly adorable! And very funny! I'm such a dog (or animal) person but as I'm not yet in the position to love my own, I happily adore everyone else's instead.
Hence the reason I made these biscuits! I came across the recipe on Chubby Hubby. They're incredibly easy to make and come out quite soft therefore good for the older doggies too I should think. I did a bit of a google search just to double check because I heard nuts can be poisonous to dogs, but peanuts are deemed a legume rather than a nut so all is ok.
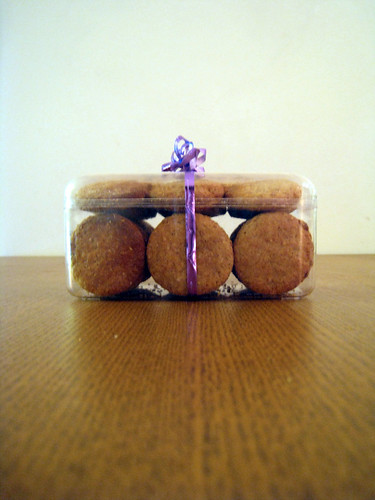
Popped into an empty Ferrero Rocher box (of which there were plenty lying around after Christmas) with a stray ribbon added for cheer, I had a cute little gift for my new little puppy friend.
Peanut butter dog biscuits Makes many biccies!
230g wholewheat flour 1 tablespoon baking powder 260g natural peanut butter (I used unsweetened organic) 225ml milk
Mix together the flour and baking powder in a large bowl. In another bowl combine peanut butter and milk. Whisk with a fork until it has the texture of a thick milkshake. Add the peanut butter and milk mixture into the dry ingredients. Mix well and knead until it forms a uniformly mixed ball of dough. Wrap in clingfilm and chill in the refrigerator for several hours or overnight.
Using half the dough at a time, on a lightly floured surface roll out to 6-7mm or 1/4 inch thick. The dough is very greasy so I found it easier to roll with cling film over the top. Using a cookie cutter (or in my case improvise with a shot glass), cut out shapes and place 2cm apart on a baking tray. Roll the dough scraps together and repeat. Place the unbaked biscuits in the freezer for 15-20 minutes. This is easier if you place them all on the baking tray first. Meanwhile preheat oven to 200˚C.
Remove the biscuits from the freezer and bake in the oven for 10 minutes or until very lightly browned. Cool on a rack and store in an airtight container.
One batch of muffins is never enough when I come home which explains the two muffin recipes back to back.Orange and cranberry muffins are by far one of my favourites and I always look forward to making them at this time of year when there are fresh cranberries in the shops.
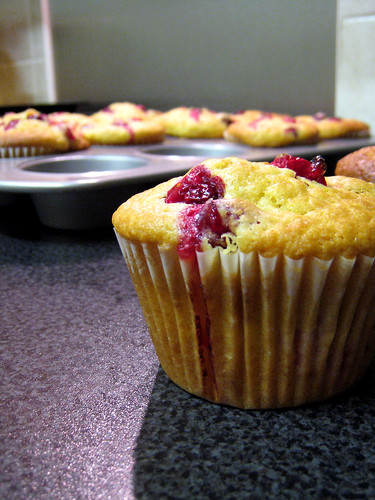
I first discovered the tangy orange and cranberry combination at, ahem, Starbucks quite a few years ago as one of their Christmas limited editions and was entirely addicted for a whole winter. However I wasn’t going to let the obsession burn a hole in my pocket a second winter running so it became only wise to attempt to make my own. I played around with various recipes, some using marmalade, some using cranberry sauce, and the one I settled on draws from a couple. It makes gorgeous muffins that are not too sweet so the tartness of the cranberries really zing on the tongue which is just the way I like these. Although dried cranberries would do fine I’ve only ever wanted to make these with fresh berries for all their brightness, tanginess, juiciness and loveliness. They burst and wrinkle in the heat of the oven oozing their juices everywhere so when I pull the muffin tray out the whole thing looks like a delightful pink and orange explosion. These muffins don’t rise into the cute mounds I’m used to I think because of the weight of the cranberries. Instead they tend to ooze over the sides onto the tray further adding to that look of explosion but don’t let this dissuade you because they are still wonderfully moist and the scent that fills the kitchen as they bake is so uplifting. In fact I love to savour the scent of one of these first before I tuck into it.
Orange and cranberry can’t help but refresh the taste buds with their zest and sharpness combined. But I also love how their bright deep pink and orange together dance at the eyes and their tangy aroma awakens the nose. If like me you are not a morning person in the slightest, one of these muffins along with a strong cup of caffeine will at the very least give you enough zing to get you out of bed.
Orange and Cranberry Muffins
Adapted from ‘Muffins Fast and Fantastic’ by Susan Reimer
Makes 10-12
280g plain flour
3 tsp baking powder
½ tsp bicarbonate soda
½ tsp salt
110g caster sugar
1 egg
Finely grated orange zest of 3 large oranges
Juice of three oranges (about 260ml); add water to make total of 260 ml if not enough juice
85g butter or 90ml vegetable oil
110g fresh cranberries left whole, plus more for topping (increase the volume of liquid by 3 tbsp if using dried cranberries)
Preheat oven to 190-200˚C (375-400˚F, Gas Mark 6) and prepare muffin tray with muffin cases. In a large bowl sift together flour, baking powder, bicarbonate of soda, salt and sugar. In another bowl beat egg with a fork then add zest of orange, juice (plus water if needed), followed by oil/melted butter. Pour all of wet mixture into dry and stir until just combined, adding the cranberries during the final strokes. Batter will be lumpy. Spoon immediately into muffin cases and top each with a few more cranberries. Bake for 20-25 minutes, until tops are lightly browned and spring back when pressed gently.
I’m back home for a couple of weeks now to spend Christmas with my family which is a great excuse to get muffin-baking not least because I have plenty to share them with and my muffin tray is at my parents’ place. As a fan of chestnuts especially at Christmas I wanted to incorporate some into a muffin recipe. Chestnut puree is quite often used as a layer in gorgeous Chinese cakes and this combined with the idea of muffins with fillings - think rhubarb muffins with custard inside - led me to chocolate muffins with chestnut filling.
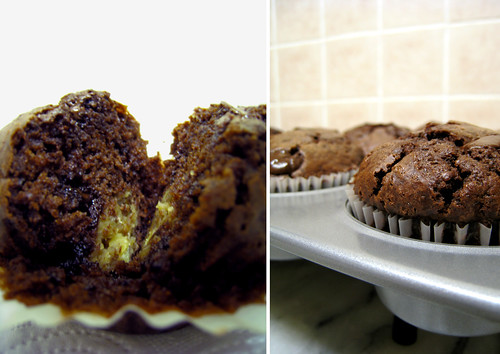
Chestnut puree goes really well with delicate vanilla sponge in Chinese cakes because the cream enveloping the cake tempers the puree down to a lighter, milky chestnut flavour and the fresh fruit topping maintains the lightness of the overall cake. The muffin however lacks this room for manoeuvre so I felt the chestnut needed to be paired with something heady enough not to be overpowered by it, chocolate being the most obvious, although I think coffee would work well too. Chocolate it was and the result went down a treat with my only regret being that I didn’t fill the muffins well enough with the chestnut. I was quite hesitant in putting more than a small-sized blob into each because the chestnut filling was a culmination of guesswork and my faffing with a blender and some chestnuts. The materialisation of my efforts in the bowl therefore initially didn’t taste as good as I was expecting. It was a strange mixture of sickly sweet vanilla and salty however to my relief once baked in the muffins it mellowed out a lot to let the earthy nuttiness come through. My mum who loves chestnuts but has an odd aversion to chocolate still managed to gobble a couple of these down and like me would have preferred more of the chestnut please!
For the chestnut filling
200g roasted chestnuts 1 tbsp icing sugar 150-200ml water, hot from the kettle Couple of drops of vanilla essence Tiny pinch of salt
Puree the chestnuts in a liquidiser or blender with the icing sugar and 100ml of the water. I wanted some texture to the filling so I avoided completely blitzing the chestnuts and retained a good amount of coarseness. Scrape puree into a bowl, add the vanilla essence and salt and combine. Add enough of the rest of the water to make a light paste and set aside.
The texture of the filling is down to personal preference but I found that once cooked in the muffins, it became very set which I hoped for over a runny filling (adding butter would have made a more fluid filling I think). The 200g chestnuts made more filling than I needed but next time I make these I plan to incorporate more into each muffin anyway.
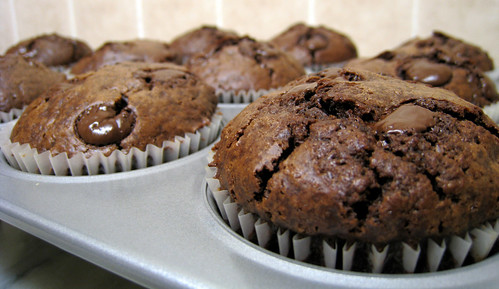
225g plain flour 2 tsp baking powder ½ tsp bicarbonate soda ½ tsp salt 110g caster sugar 4-5 tbsp unsweetened cocoa powder 1 egg 260ml milk – I intend to up this quantity a little next time as the muffins didn’t stay as moist as others I have made before 1 tsp vanilla essence 85g butter or 90ml vegetable oil 100g dark chocolate chips plus more for sprinkling – I use 53.8%
Preheat oven to 190-200˚C (375-400˚F, Gas Mark 6) and prepare muffin tray with muffin cases. In a large bowl sift together flour, baking powder, bicarbonate of soda, salt, sugar and cocoa powder, then add the chocolate chips. In another bowl beat egg with a fork then stir in milk and vanilla, followed by oil/melted butter. Pour all of wet mixture into dry. Stir just until combined and no dry flour is visible. Batter will be runny.
Half fill muffin case with muffin batter. Spoon one slightly heaped teaspoon of chestnut filling onto middle of muffin mix. Cover chestnut filling with more muffin batter and fill to three-quarters full. Sprinkle top with a few chocolate chips. Repeat for rest of muffin cases and bake for 20 minutes or until muffins are risen and tops spring back when pressed gently.
Whilst browsing through Cox & Cox I came across the brown sugar hearts pictured below and thought they were utterly adorable. When I first caught sight of them though I thought they were cookies and my heart sank a bit when I realised they were sugar lumps. I don't take sugar in my tea and I like my coffee only barely sweet.
The disappointment however inspired me to create my own cookies for perching so cutely off the side of a mug. I found a recipe for a basic vanilla shortbread dough and set about on my plan. With Christmas fast approaching (yes I know I know, but it is almost December now and I can't help but be excited) I thought why not be a bit seasonal and decided to go for stars rather than hearts. For added Christmas cheer I divided my batch of dough into two and added orange zest to one of them.
Carefully cutting nicks into my stars of dough I kept my fingers crossed this would work. The last thing I wanted was for their little arms to snap off after baking but as you can see they hung on in there! There were a couple of casualties but needless to say, they weren't wasted. The trick is to mould them slightly to your mug before they go in the oven. I've presented these with a mug of tea but I'd imagine they'd be just as happy clinging onto the side of desserts as well waiting to dive in! Countless biscuit recipes would lend themselves well to the idea. I can see ginger snaps with servings of vanilla ice cream... brazil nut biscuits with warm chocolate pots... elegant shortbread (again) with glasses of summery desserts of berries and cream... and homely oat cookie-bites on ramekins of stewed autumn fruits and custard.
The recipe made a nice crumbly shortbread. If I had dried cranberries or chopped almonds I think they would have complemented the zest very well. The basic vanilla ones were not as buttery as I would have liked but still very moreish nonetheless.
I'm really chuffed with how the idea turned out. Now mugs can enjoy getting into the festive spirit too. And looking at these pictures I wonder how cute the stars would have been had I iced smiley faces onto them!
Everyone I know likes banana bread. It's one of those cakes that spans all tastes and ages. Young and old alike love it, even some who hate bananas love it. It's that very true and unassuming quality about banana bread which makes it appeal to the masses. It's the labrador of the cake world. It's a hug in a cake. At home our most baked cake without a doubt is banana bread (or 'fanana fred', as we like to call it for some odd reason). This is no surprise because it is so quick and easy to make. At the same time it tastes scrumptious and fills the house with a welcoming aroma as it bakes. I'm certain that when I go home my mum buys more bananas than we can eat so she can dupe me into making batches of banana bread. And as the dutiful, banana-bread-loving daughter that I am, I pretend to be oblivious to her wily ways and bake double batches at a time with glee.
Traditionally we used to follow a recipe in one of my mum's cook books until I, like many the nation's domestic bakers, was drawn by Nigella Lawson's alluring love of food and I decided to try her recipe one day. What a revelation. I already thought our banana bread was good, but her recipe makes for one that is so much fluffier in texture and more melt in the mouth but without losing any of that all important hardy sponginess. Everyone I have made it for or I have passed the recipe to raves about how delicious and soft it is. Nigella's recipe can be found here but I haven't mentioned yet that all my gushing refers to my version in that I omit the alcohol, fruit and nuts. I can't have foreign bodies in my banana bread! Banana bread is best enjoyed without crunchy nuts and chewy fruits disrupting its lovely squidgyness and comforting flavour. As I said it's the unassuming constitution that makes it what it is. Blinging it up is like trying to turn it into something it is not. I am so adamant of this that I will not even have chocolate in my banana bread. That is how stubborn I am about banana bread but it is only because I love it so, just the way it is.