Sunday, February 22, 2009

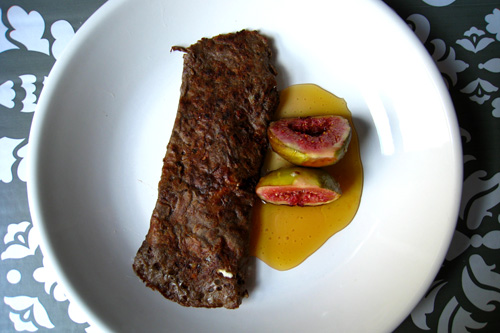
Goat Cheese Galettes with Baked Figs & Honey


What I love about Shrove Tuesday is that you can eat as many crepes or pancakes as you like without feeling like a freak. Crepes for breakfast, lunch and dinner? Go ahead it's Shrove Tuesday! Three course meal of blinis, galettes and crepes? Why not? It's Shrove Tuesday! I relished a two course meal of an egg, ham and cheese galette and chocolate crepe in the wonderful Creperie de Josselin in Paris a couple of years ago. Portions were huge and while my boyfriend sat struggling with his, I sat as if I was in pancake heaven. Only in a creperie in France or on Shrove Tuesday would I be able get away with it. I have received astonished looks from those who have witnessed me munch through pancake after pancake in one breakfast sitting. In nursery school when I tried my first pancake ever on Shrove Tuesday, I remember my teacher laughing "Another one?" as I went back for a third. I still remember clearly how they tasted. Soft, squidgy, warm and buttery.


As I have a busy week ahead and it's been since Paris that I had my last galette, this year Shrove Tuesday is Galette Sunday. Made with buckwheat flour rather than white or wholemeal, galettes are darker and crispy and make for nicer savoury dishes than its softer, paler cousin the crepe. Buckwheat is also gluten-free so these are a great alternative for coeliacs, plus vegans get a look in too because the recipe I've used is free of eggs and milk. Fillings obviously would need to be adjusted to suit. Be sure to make the batter ahead of time to let it rest, preferably the night before, otherwise the galettes will be too brittle to fold.

It may have been the recipe I chose, but my experience today taught me the perfect galette takes a lot of practise. They say the first crepe in the pan is always the worst, but in the case of galettes, or maybe more specifically my galettes, it is the first three or four. The trick is to have the batter at the right consistency and not to pour too much into the pan. The thicker it is the longer it takes to cook and nomatter how long I left it, it remained very wet. When I did manage to make a lovely crisp galette, it was when just enough batter was poured to thinly cover the base of the pan, so thin that several little holes appeared as it cooked but don't worry about these. Better to have a crispy galette with a few holes than a big brown mushy mess in your pan. I should have taken a picture of my pile of failed attempts which just seemed to get bigger and bigger.

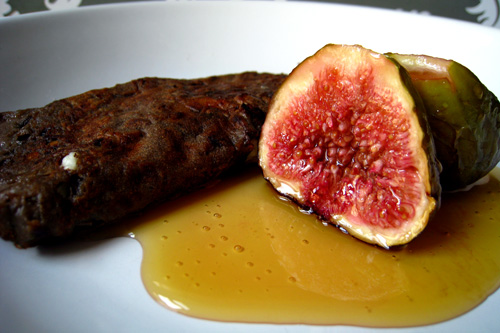
Opting for the sweet-savoury sensation I filled them with goats cheese seasoned with black pepper and thyme, and served them with warm baked figs and honey. Delicious.


Goat cheese galettes with baked figs & honey
Makes 8 servings

For the batter:
  • 250g buckwheat flour
  • 125ml water
  • 125ml sparkling cider (or water which would do just as fine)
  • 5g salt
  • 300ml water for after batter is allowed to rest

For the filling:
  • 500g soft goats cheese, crumbled
  • thyme
  • black pepper

For the baked figs:
  • 8 figs
  • 5g butter
  • 5 tsp sugar
  • lemon juice

Add salt to the flour in a bowl and mix in the water and cider in two parts. Once combined mix on lowest setting if using a mixer or by hand for 10 minutes. Allow batter to rest in fridge for at least 4 hours, or preferably overnight. Add 300ml water, going slow with the last 100ml which should be added gradually to achieve the required consistency of somewhere between that of single and double cream. Mix on slowest setting or by hand for 5 minutes.

Figs can go in the oven before the second mixing of the batter. Preheat oven to 200 degree C and smear butter on base of baking dish. Trim stems from the figs and cut figs in half. Place figs cut side up on baking dish and sprinkle with half the sugar and a little lemon juice. Place in oven for 15 minutes. Baste with juices before sprinkling over the remaining sugar and baking for a further 5 minutes.

To make the galettes, heat a frying pan or round flat griddle until hot. Smear with a little butter. Pour just enough batter to cover base of pan thinly. Allow to cook then top with goats cheese according to how the galette will be folded. You are not meant to flip galettes but I cheated and flipped mine (which was a feat in itself) to get them to cook. Sprinkle cheese with some fresh thyme and ground black pepper. Allow cheese to melt before folding galette and serving with baked figs and honey.
Monday, February 16, 2009

Baozi Inn


As I was in London for the weekend, we had planned to have sunday lunch at Little Bay in Farringdon to take advantage of their current 'pay what you think it's worth' February promotion (get there while you can!). This was until we realised that in typical London fashion all underground lines to Farringdon were closed for engineering works. To save from further disappointment we decided to head towards Chinatown where we were bound to find a place for some tasty eats before I boarded the train back home.

Leong's Legends was first in our list of preferences. I have wanted to try this well-reviewed Taiwanese restaurant for quite some time, especially having experienced the real deal in Taiwan and missing the food there desperately. Looking at the menu in the window not many dishes struck me as Taiwanese but we wanted to give it a go anyway as it was also recommended by a Taiwanese friend. So in we went. The place was packed and the staff were busy. So busy that we were completely ignored for the whole time we stood there feeling like right plums. Pushing past us several times to grab whatever they were grabbing not a single member of staff made eye contact or offered "We're full right now, you will have to wait a while" including someone who appeared to be the manager. Having eaten in all sorts of Chinese places I'm quite used to abrupt or unfriendly service but I've never been blanked so rudely before. It was particularly poor and surprising especially for quite a nice looking restaurant so I'm torn between trying again in the future or not. Feeling slightly, though mainly wrongly, embarrassed off we went in search of somewhere else.


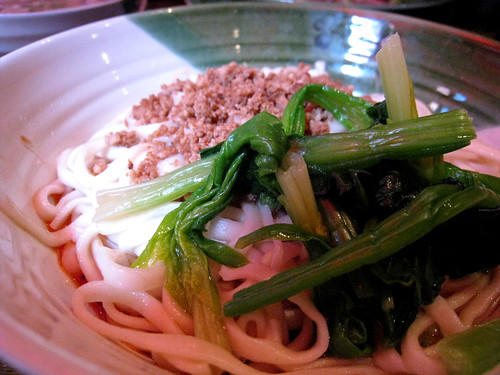
Dan dan mian

Baozi Inn was next on the 'to try' list. Specialising in Bei Jing and Sichuan dishes, was Baozi Inn to be our third time lucky? Well we managed to get fed so I guess so! We walked in to be immediately greeted and seated by the window in a 1950's China kitsch setting. Low wooden stools, exposed brick, red lanterns... it all looked quite charming but possibly a little polished for what it was trying to convey.
And the plastic vegetables looked a little out of place to me and more suited to a French or Italian.

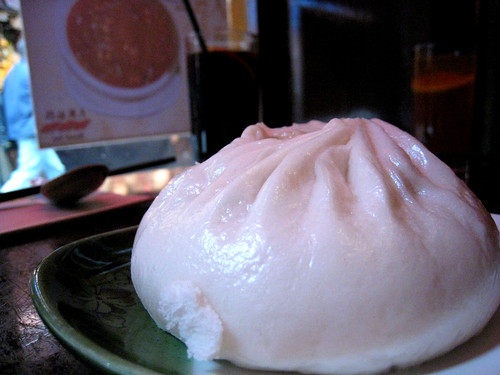
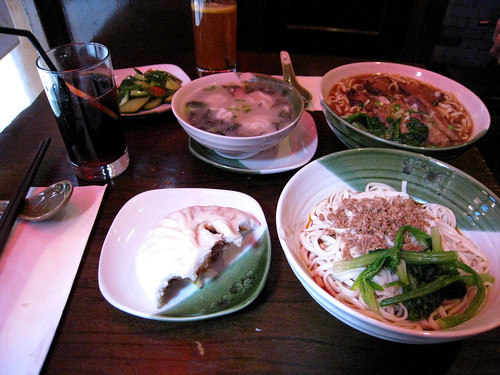
My boyfriend ordered a set meal which consisted of pork rib noodles in broth, dragon dumplings in broth and pickled cucumber salad. I went for the Northern China pork baozi and the dan dan mian which is a very traditional Sichuan noodle dish. I also ordered a glass of coke which I oddly crave with spicy foods in anticipation of the mouth-numbing noodles. While the food was generally tasty and definitely filling, as I left I couldn't help feeling that it was ultimately disappointing, too salty and over-priced. My dan dan mian was very oily and barely hot and spicy enough to warrant the breaking of my usual avoidance of fizzy drinks.
Instead of the heat I was after, I was left with an uncomfortable parched feeling in my mouth which I could only put down to copious amounts of salt and MSG. They were also very sparing with the topping of pork. And while the baozi was good, it was not good enough for a return visit, or maybe I'm just too attached to their Cantonese counterparts. The cucumber was tasty with a nice refreshing crunch but I think I appreciated these more for cleansing the palate which was much needed with my dishes but not in a favourable way. Positive notes were that the ribs and broth of my boyfriend's noodles were very flavoursome and the one dish I really couldn't fault were the dragon dumplings. The broth was light and just right, and the dumpling casings were lovely and silky. I could have had more of these very easily.


Clockwise from top left: cucumber salad, dragon dumplings, pork rib noodles, dan dan mian, and my half-eaten pork baozi!

Service was quick but there was some hovering which was quite distracting at times. When we arrived, there were two other sets of diners but by the time we left, the restaurant was steadily beginning to fill up. So while I was not impressed, I may be in a minority. All in all Baozi Inn was ok but didn't live up to the hype or to the prices. I've eaten better Northern Chinese and Sichuan cuisine cooked by friends from the regions. We paid £18 for our meal including drinks.

Baozi Inn
25 Newport Court

London

WC2H 7JS
Phone: 0207 2876877

Friday, February 06, 2009

Masala Chai


When lectures are cancelled for a second day running

And it's cold and slushy outside,
I delve into 'The Little Prince'
Whilst sipping a brew of masala chai.


Masala chai
Makes 2 servings

375ml water
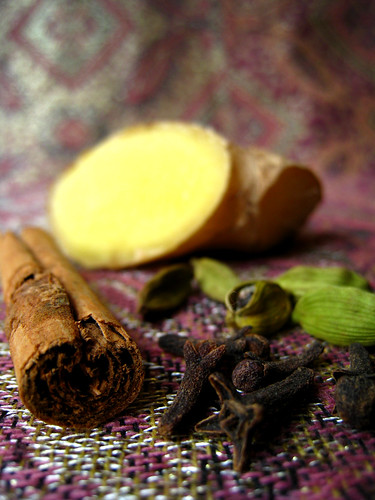
8 cardamom pods
8 whole cloves
1 inch stick of cinnamon
3 slices of fresh ginger
165ml milk
3 tsp brown sugar (or to taste)
2 black tea bags

Put the water, cardamom, cloves, cinnamon and ginger into a pan and bring to a boil. Turn the heat down, cover, and simmer very gently for 10 minutes. Add milk and sugar and bring back to a simmer. Turn off the heat, add the tea bags, and cover. Let steep for 2 minutes. Remove tea bags and strain masala chai into two cups and serve immediately.


Slushy on the roads but gloriously snowy in the fields. My first snowman in years!

Thursday, February 05, 2009

Reine de Saba Brownies


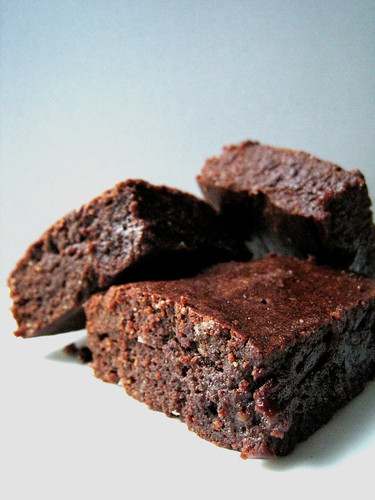
What do you do when when lectures are officially cancelled because of snow? Jump for joy and bake brownies of course! I've made brownies twice before and both times they didn't turn out how I wanted. Texture-wise, taste-wise, everything. The perfect brownie recipe I think is one of the most elusive and this along with previous failures certainly made me wonder whether I should try again. However when the idea of that yummy chocolately dense fudgy gooeyness enters my mind I always want to be able to make it into something tangible, through my own efforts.

So here is my latest attempt which I made today and they're actually really good, my best attempt yet. Prevous mistakes have taught me well. I've learned that recipes with too much 70% chocolate and cocoa powder make brownies that are far too bitter. I've learned that I should not leave it baking for just a little longer. I've learned that plain brownies are better than those loaded with chocolate chunks or nuts. And from bakery or coffee-shop bought brownies, I've learned that I have a preference for brownies which have gound almonds in them.


So a bit of a google search brought up Reine de Saba (Queen of Sheba) brownies which are a French brownie. These are based on the Reine de Saba chocolate and almond cake which requires the separating of eggs and the whisking of egg whites, and the addition of rum amongst some other ingredients. However the Reine de Saba brownie recipe which seems to be quoted all over the internet omits these.

The recipe makes soft, dense brownies and although they lack the flaky top layer, the top still has a slight bite and crack to it. I personally would prefer them slightly richer because I do like my brownies quite intense, then they would be perfect!

Reine de Saba brownies
Makes 9 squares

125g dark chocolate (I used 70%)
125g butter
125g sugar
3 eggs
60g ground almonds
50g plain flour

Preheat oven to 180
˚C and line an 8x8 inch square cake pan. Melt the chocolate in a large bowl over simmering water. Mix in the butter until melted. Remove bowl from heat and mix in the sugar, then whisk in the eggs, and finally incorporate the ground almonds and flour. Pour mixture into the cake pan and bake for 15-20 minutes.

I baked mine for 20 minutes however I think less would have been better, or 20 minutes at a lower temperature, as the edges were a wee bit overdone. The middle was however lovely and dense and gooey.

Saturday, January 31, 2009

Peanut Butter Dog Biscuits


Finally! The deadline I had been waiting so long for has passed.
Finally! I can catch up on all the foodie blogs I love.
Finally! I can catch up on The Great British Food Fight!!
Finally! I can take the time to cook again!

When I'm studying hard or know I should be, even just ten minutes to make a simple pasta dish feels like an eternity. If I'm not sitting infront of my laptop, I start stressing that I should be, despite the fact that a lot of the time even infront of my laptop I'm procrastinating as opposed to actually working.

I had wanted to write about a Chinese dish I made recently as Chinese New Year has just come and gone. It turned out really well, really delicious. However I kept it on the hob a little too long and certain components ended up looking a bit too worse for wear for photographing. Once I've perfected the dish though you will surely see it here.


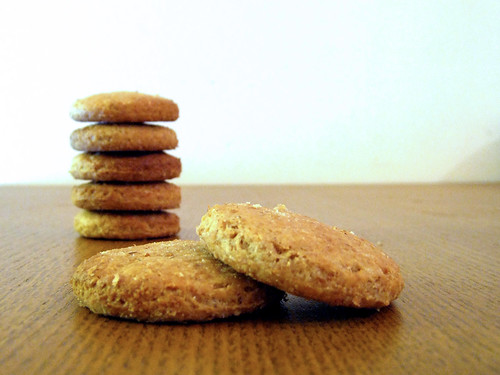
Or maybe I should simply stick to the baking! Baked things are without a doubt easier to pretty up and photograph. I baked these dog biscuits after the new year for when I went to visit a friend who only just got a miniature schnauzer puppy last autumn. Incredibly adorable! And very funny! I'm such a dog (or animal) person but as I'm not yet in the position to love my own, I happily adore everyone else's instead.

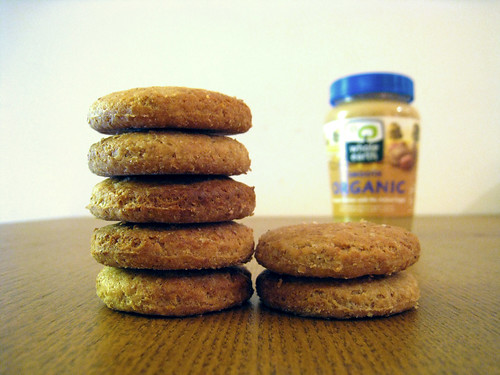
Hence the reason I made these biscuits! I came across the recipe on Chubby Hubby. They're incredibly easy to make and come out quite soft therefore good for the older doggies too I should think. I did a bit of a google search just to double check because I heard nuts can be poisonous to dogs, but peanuts are deemed a legume rather than a nut so all is ok.

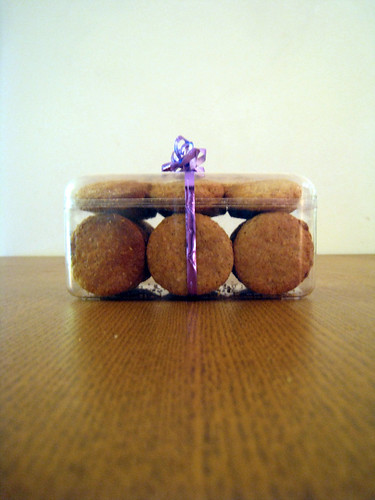
Popped into an empty Ferrero Rocher box (of which there were plenty lying around after Christmas) with a stray ribbon added for cheer, I had a cute little gift for my new little puppy friend.


Peanut butter dog biscuits
Makes many biccies!

230g wholewheat flour
1 tablespoon baking powder
260g natural peanut butter (I used unsweetened organic)
225ml milk

Mix together the flour and baking powder in a large bowl. In another bowl combine peanut butter and milk. Whisk with a fork until it has the texture of a thick milkshake. Add the peanut butter and milk mixture into the dry ingredients. Mix well and knead until it forms a uniformly mixed ball of dough. Wrap in clingfilm and chill in the refrigerator for several hours or overnight.

Using half the dough at a time, on a lightly floured surface roll out to 6-7mm or 1/4 inch thick. The dough is very greasy so I found it easier to roll with cling film over the top. Using a cookie cutter (or in my case improvise with a shot glass), cut out shapes and place 2cm apart on a baking tray. Roll the dough scraps together and repeat. Place the unbaked biscuits in the freezer for 15-20 minutes. This is easier if you place them all on the baking tray first. Meanwhile preheat oven to 200˚C.

Remove the biscuits from the freezer and bake in the oven for 10 minutes or until very lightly browned. Cool on a rack and store in an airtight container.

Tuesday, December 23, 2008

Orange and Cranberry Muffins


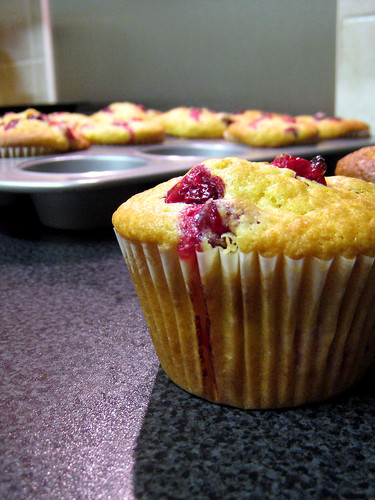
One batch of muffins is never enough when I come home which explains the two muffin recipes back to back. Orange and cranberry muffins are by far one of my favourites and I always look forward to making them at this time of year when there are fresh cranberries in the shops.


I first discovered the tangy orange and cranberry combination at, ahem, Starbucks quite a few years ago as one of their Christmas limited editions and was entirely addicted for a whole winter. However I wasn’t going to let the obsession burn a hole in my pocket a second winter running so it became only wise to attempt to make my own. I played around with various recipes, some using marmalade, some using cranberry sauce, and the one I settled on draws from a couple. It makes gorgeous muffins that are not too sweet so the tartness of the cranberries really zing on the tongue which is just the way I like these. Although dried cranberries would do fine I’ve only ever wanted to make these with fresh berries for all their brightness, tanginess, juiciness and loveliness. They burst and wrinkle in the heat of the oven oozing their juices everywhere so when I pull the muffin tray out the whole thing looks like a delightful pink and orange explosion. These muffins don’t rise into the cute mounds I’m used to I think because of the weight of the cranberries. Instead they tend to ooze over the sides onto the tray further adding to that look of explosion but don’t let this dissuade you because they are still wonderfully moist and the scent that fills the kitchen as they bake is so uplifting. In fact I love to savour the scent of one of these first before I tuck into it.


Orange and cranberry can’t help but refresh the taste buds with their zest and sharpness combined. But I also love how their bright deep pink and orange together dance at the eyes and their tangy aroma awakens the nose. If like me you are not a morning person in the slightest, one of these muffins along with a strong cup of caffeine will at the very least give you enough zing to get you out of bed.


Orange and Cranberry Muffins

Adapted from ‘Muffins Fast and Fantastic’ by Susan Reimer

Makes 10-12


280g plain flour

3 tsp baking powder

½ tsp bicarbonate soda

½ tsp salt

110g caster sugar

1 egg

Finely grated orange zest of 3 large oranges

Juice of three oranges (about 260ml); add water to make total of 260 ml if not enough juice

85g butter or 90ml vegetable oil

110g fresh cranberries left whole, plus more for topping (increase the volume of liquid by 3 tbsp if using dried cranberries)


Preheat oven to 190-200˚C (375-400˚F, Gas Mark 6) and prepare muffin tray with muffin cases. In a large bowl sift together flour, baking powder, bicarbonate of soda, salt and sugar. In another bowl beat egg with a fork then add zest of orange, juice (plus water if needed), followed by oil/melted butter. Pour all of wet mixture into dry and stir until just combined, adding the cranberries during the final strokes. Batter will be lumpy. Spoon immediately into muffin cases and top each with a few more cranberries. Bake for 20-25 minutes, until tops are lightly browned and spring back when pressed gently.

Monday, December 15, 2008

Chocolate Muffins with Chestnut Filling


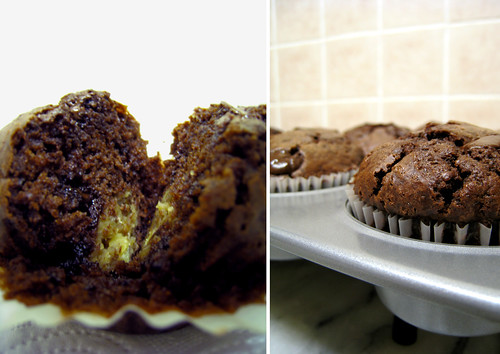
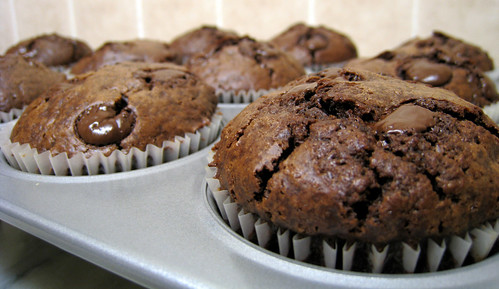
I’m back home for a couple of weeks now to spend Christmas with my family which is a great excuse to get muffin-baking not least because I have plenty to share them with and my muffin tray is at my parents’ place. As a fan of chestnuts especially at Christmas I wanted to incorporate some into a muffin recipe. Chestnut puree is quite often used as a layer in gorgeous Chinese cakes and this combined with the idea of muffins with fillings - think rhubarb muffins with custard inside - led me to chocolate muffins with chestnut filling.

Chestnut puree goes really well with delicate vanilla sponge in Chinese cakes because the cream enveloping the cake tempers the puree down to a lighter, milky chestnut flavour and the fresh fruit topping maintains the lightness of the overall cake. The muffin however lacks this room for manoeuvre so I felt the chestnut needed to be paired with something heady enough not to be overpowered by it, chocolate being the most obvious, although I think coffee would work well too. Chocolate it was and the result went down a treat with my only regret being that I didn’t fill the muffins well enough with the chestnut. I was quite hesitant in putting more than a small-sized blob into each because the chestnut filling was a culmination of guesswork and my faffing with a blender and some chestnuts. The materialisation of my efforts in the bowl therefore initially didn’t taste as good as I was expecting. It was a strange mixture of sickly sweet vanilla and salty however to my relief once baked in the muffins it mellowed out a lot to let the earthy nuttiness come through. My mum who loves chestnuts but has an odd aversion to chocolate still managed to gobble a couple of these down and like me would have preferred more of the chestnut please!

For the chestnut filling

200g roasted chestnuts
1 tbsp icing sugar
150-200ml water, hot from the kettle
Couple of drops of vanilla essence
Tiny pinch of salt

Puree the chestnuts in a liquidiser or blender with the icing sugar and 100ml of the water. I wanted some texture to the filling so I avoided completely blitzing the chestnuts and retained a good amount of coarseness. Scrape puree into a bowl, add the vanilla essence and salt and combine. Add enough of the rest of the water to make a light paste and set aside.

The texture of the filling is down to personal preference but I found that once cooked in the muffins, it became very set which I hoped for over a runny filling (adding butter would have made a more fluid filling I think). The 200g chestnuts made more filling than I needed but next time I make these I plan to incorporate more into each muffin anyway.

For the muffins
Adapted from Muffins Fast and Fantastic by Susan Reimer
Makes 10-11

225g plain flour
2 tsp baking powder
½ tsp bicarbonate soda
½ tsp salt
110g caster sugar
4-5 tbsp unsweetened cocoa powder
1 egg
260ml milk – I intend to up this quantity a little next time as the muffins didn’t stay as moist as others I have made before
1 tsp vanilla essence
85g butter or 90ml vegetable oil
100g dark chocolate chips plus more for sprinkling – I use 53.8%

Preheat oven to 190-200˚C (375-400˚F, Gas Mark 6) and prepare muffin tray with muffin cases. In a large bowl sift together flour, baking powder, bicarbonate of soda, salt, sugar and cocoa powder, then add the chocolate chips. In another bowl beat egg with a fork then stir in milk and vanilla, followed by oil/melted butter. Pour all of wet mixture into dry. Stir just until combined and no dry flour is visible. Batter will be runny.

Half fill muffin case with muffin batter. Spoon one slightly heaped teaspoon of chestnut filling onto middle of muffin mix. Cover chestnut filling with more muffin batter and fill to three-quarters full. Sprinkle top with a few chocolate chips. Repeat for rest of muffin cases and bake for 20 minutes or until muffins are risen and tops spring back when pressed gently.